There is a new feature in vSphere 7 allowing admins to change FQDN and IP of vCenter Server Appliance, the feature for which I personally was waiting a long time.
Why am I interested in changing FQDN or IP?
Recently we acquired another company and I would like to change their vCenters FQDNs to the naming convention in my company for consistency.
Another reason is that I moved one of datacenters and FQDN is not consist with new location.
Furthermore, in my current FQDN I have number of running version something like this : vCenter-6.5-London. I don’t want version number anymore as it is not consist with real version we are on.
Before you jump to changing PNID, have a look on some consideration you need to take: Before and After vCenter FQDN and IP (PNID) change – IMPORTANT!
Here is my playbook:
- Login to VAMI – vCenter Server Appliance Management Interface – on port 5480
- Go to Networking

- On the Networking page click EDIT in top right corner for Network settings

- Select Network Adapter and click NEXT
- Here is the place where you can change Hostname and DNS

- Below Hostname and DNS you can change IP settings for NIC
- Click NEXT and you will be prompt for administrator password
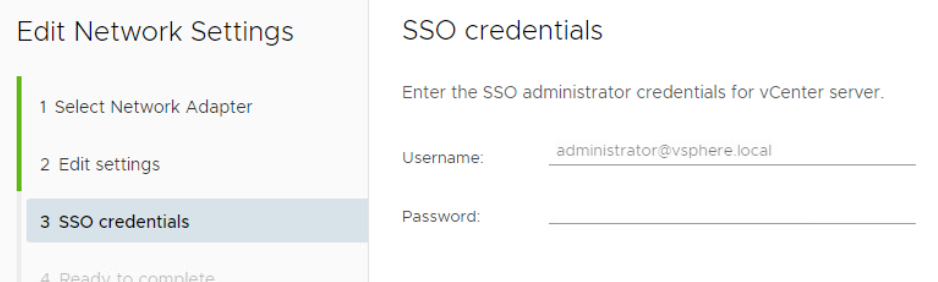
- Click NEXT and you will be presented with “Ready to complete” summary page. Review your new settings and accept the acknowledgment that you made a backup of vCenter Server Appliance before continuing with the network configuration.
NOTE: Be sure that FQDN and IP address are set properly.
Also changing NIC of management network adapter WILL result in downtime of your vCenter Server and can take some time before it will be up and running.
- Once you happy with your changes check acknowledge box on the bottom and click FINISH

- A taskbar shows the status of the network update. When the network reconfiguration is complete, the UI redirects to the new IP address

NOTE: The task is complete only when all services successfully start.
- Once change is progressed, pop-up window will appear to validate credentials

- After login upgrade will continue

- Finally we can close the window

OK guys, this is all what I have today for you. Enjoy! Subscribe to my YouTube channel.